Machine vision speeds ammunition inspection
Andrew Wilson, Editor, [email protected]
Combining brass cases and bullets with powders and primers, precision-made ammunition must function flawlessly, especially when used in automatic weapons where high throughput is a requirement. Before cartridges are boxed for shipping, they must be precisely inspected to ensure that each cartridge is of the correct caliber and that it is free from any perforations, nicks, dents, or other damage.
“Such cartridges can vary from .22 caliber to .50 caliber in diameter,” says Mark Grinager, president of M&S Automated Feeding Systems (Burnsville, MN, USA; www.msautomated.com), “and must be checked after manufacture to ensure they meet the company’s inspection criteria.” General Inspection (Davisburg, MI, USA; www.geninsp.com) has developed an inspection system (with a feeding system developed by M&S) that automatically loads parts into an inspection station, sorts the parts according to their dimensions, and inspects the surface of each cartridge for any potential damage.
“After parts are manufactured,” says Grinager, “they are fed onto an M&S-designed EBH-20 elevating belt hopper and deposited in a CB-54 centrifugal bowl feeder.” In this bowl feeder, each of the cartridges are oriented end to end and ejected onto an orientation conveyor, where the parts are separated and their orientation checked.
“Because the dimensions of each caliber are well-defined,” says Grinager, “it is a relatively simple task to check their orientation.” To do this, a PresencePLUS Pro Vision system from Banner Engineering (Minneapolis, MN, USA; www.bannerengineering.com) was deployed on the conveyor. “Using the system’s “Edge” tool, the presence, number, and location of edges within the image can be determined. From the data, the system calculates the orientation of the part. Should a part be orientated incorrectly, an NPN/PNP output from the vision system triggers a Micrologic PLC from Allen-Bradley (Milwaukee, WI, USA; www.ab.com) that is, in turn, used to control a pneumatic solenoid from SMC (Indianapolis, IN, USA; www.smcusa.com) that routes air to a pneumatic actuator to reject the faulty part with an air blast.
Properly oriented parts pass into an additional inspection station, where they are examined for straightness, concentricity, and any critical flaws on the casing. To accomplish this, General Inspection’s 6V system inspects every component of the assembled cartridge at rates exceeding 300 parts/min using three stations.
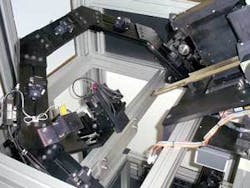
The 6V uses a Vee track, and parts slide down through multiple stations via gravity. The system has ten area-array cameras from Point Grey Research (Vancouver, BC, Canada; www.ptgrey.com). While a camera mounted on the first station is used on-axis to inspect for crack defects on the case, the second station uses eddy-current technology to examine whether the parts are annealed properly.
A laser-gauging option measures dimensional characteristics of the ammunition, such as head height, length to shoulder, neck diameter, body diameter, groove diameter, taper angle, and overall length. The last station uses eight Point Grey area-array cameras to inspect the surface of the cartridge for perforations, splits, wrinkles, buckles, dents, and scratches.

