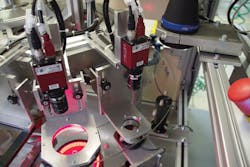
Industrial Automation: Vision systems inspects automotive components
Founded in 1995 by Thomas Rothweiler, Gefra (Friedewald, Germany; (www.gefragmbh.de) manufactures automated systems designed to inspect metal fasteners such as screws, nuts or washers. In a system to check cup screws for vehicle brake lines, the company has developed a system consisting of six inspection stations that incorporate multiple cameras.
After the cup screws are placed into a vibrating bowl feeder, they are fed to an 800mm diameter rotating glass ring the sorting system in two possible orientations. For this reason, five of the inspections stations in the system are configured so they can inspect the part both from the top and bottom.
The first of these six stations measures the geometric dimensions of each part including the thread diameter, its dimensions and whether any possible burrs are present. Using telecentric lighting and lenses from Opto Engineering (Mantova, Italy;www.opto-engineering.com), images are captured using a 1.3 Megapixel, 2/3in CMOS Firewire camera from Allied Vision Technologies (AVT; Stadtroda, Germany www.alliedvisiontec.com) and transferred to a host PC. Using NI Vision software from National Instruments (Austin, TX; www.ni.com), the dimensions of the part are then measured.
After this inspection, a second system images the side view of the part and checks its thread, pitch and height. The next station, equipped with an LED dark field illumination system from CCS America (Burlington, MA, USA;www.ccsamerica.com), ensures that the part is not chipped. This is followed by an inspection station that is used to detect damage such as scratches, deformation or coating faults and then a fifth station that detects differences in coating and deviations in brightness and color.
Finally, a check is conducted to determine whether the threads are continuous, and whether the threads are clean of defects. Here, four cameras also from AVT are arranged at 90o intervals. Each of these cameras covers an angle of 110 to 120o, so that the cup screws can be inspected in one pass.
After this final inspection station, all objects which have passed the inspections without fault are ejected from the system using a triggered pneumatic valve.
Ejected good parts pass through a pipe to a rotary table from which they are filled into boxes. A counter ensures that the correct number of parts lands in each container before the rotary table moves to the next section.
According to Christoph Hüsch, Gefra's Chief Application Engineer, one of the biggest challenges in designing the system was to simultaneously control all twelve cameras in the system using a single PC.
Although the system currently achieves speeds of 500 parts/min, it is possible to inspect parts as fast as 600 parts/min according to Hüsch. A monitor and keyboard integrated in the unit are used to set-up the system and display and generate fault reports. Viewing of individual images from the unit allows faulty parts to be displayed and pseudo-colored as they are detected.

