Portable x-ray inspection system detects pipe flaws
Lawrence J. Curran
Contributing Editor
A major inspection challenge facing the factory process industries is how to examine insulated piping for blockage and corrosion, especially for corrosion under the insulation. This problem is especially troublesome for the petrochemical, refining, and paper industries. Responding to
the need, Lixi Inc. (Downers Grove, IL) has developed a pipe-scanning inspection tool called the Profiler, which can quickly and easily scan an insulated pipe while the pipe is in service. Through proper calibration, the Profiler provides a double-wall thickness measurement of the pipe.
A real-time density-measuring system that gauges the wall thickness of pipe without contact, the portable x-ray or isotope-sourced Profiler produces an output signal that is delivered to a computer for image analysis. The measuring system is designed to identify problem areas of a piping run, pinpointing where additional testing should take place.
The Profiler provides a repeatable measurement accuracy of 2% using gamma absorption from a low-level isotope. Lixi president Joe Pascente says the unit looks at a tangential angle to an insulated pipe to detect corrosion under the insulation. "Its output is not an image, but rather a series of pulse communications to a computer, which converts this information into wall or blockage thickness," he says.
Pascente points out that piping degradation caused by corrosion and erosion "are by far the most prevalent failure mechanisms in various process piping systems." Pipe degradation is usually caused by external corrosion under the insulation, internal corrosion caused by a variety of mechanisms, or internal erosion from the flowing product.
Conventional approaches
The common methods for locating problems in piping involve tangential x-ray or ultrasonic thickness tests. Pascente says that both tests produce accurate results for pipe-thickness measurements, "but most process facilities contain miles of piping, and knowing where to look for degradation is a monumental problem."
He adds that both of these nondestructive methods are also location dependent; tangential x-rays provide only one "snapshot" of the pipe per location, and ultrasonic thickness tests require that either insulation be removed or inspection ports be drilled in the insulation. "As a result, performing a comprehensive examination for all of a facility`s piping is cost-prohibitive," Pascente concludes.
The magnitude of the testing problem can be appreciated by understanding that refineries, chemical plants, and electrical-power plants use thousands of miles of pipes that have been insulated to prevent heat loss or heat absorption. The insulation often comprises several materials, with a calcium-based material being the densest. It is usually wrapped with a layer of aluminum or stainless steel.
Verification of wall thickness of these pipes is accomplished by first removing the insulation and then performing an ultrasound inspection or by taking x-rays through the insulation at an angle tangential to the edge of the pipe. The time required to obtain data with either method is measured in hours per meter. Furthermore, the ultrasound method requires that the insulation be replugged after inspection. The insulation surface also must be cleaned or the resulting data will not be accurate.
"The most common and straightforward way to inspect for corrosion under the insulation is to cut plugs in the insulation that can be removed to allow for ultrasonic testing," Pascente explains. However, the plugs can be a source of moisture leakage. "The main problem with this technique is that corrosion under the insulation tends to be localized, and, unless the inspection plug is positioned in the precise spot, corrosion sites will be missed," he adds.
The tangential x-ray method also presents some procedural problems. It sees only surface corrosion but not wall thickness, which is the key test parameter. Using tangential x-ray sources also requires that the area being inspected be roped off for radiation safety.
Enter the Profiler
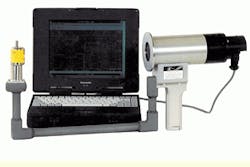
In contrast, the portable Profiler can be easily moved to the likely corrosion sites. The system consists of an isotope or x-ray source, a transmission radiation source, a microchannel-plate (MCP) x-ray detector, a laptop or palmtop computer, and proprietary software (see Fig. 1). The software converts the radiation-intensity output into linear-equivalent thickness data, which are presented on the computer monitor. The output of a collimated gadolinium-153 (Gd153) isotope source is directed to a special scintillator. The scintillator electronics contain the equivalent of a low-level x-ray CCD camera. In turn, the scintillator is coupled to a photomultiplier tube whose electronics are matched to the scintillator output.
The portable version of the Lixi Profiler has undergone several iterations since its initial release. The latest modification can incorporate one of two sources: an x-ray source from the X-Ray Technology Group of Oxford Instruments plc (Scotts Valley, CA) or a Gd153 isotope source provided by MDS Nordion (Kanata, Ontario, Canada). Pascente says the Nordion source was chosen for integration into the Profiler because that particular isotope matches the energy of steel with thicknesses up to 3 in. and because of a ten-year working relationship with the company. Lixi selected the Oxford x-ray source because Oxford has been "most responsive to our needs," according to Pascente.
Both sources produce ionizing radiation that is detected by the MCP x-ray detector. The Gd153 isotope source is more appropriate for use when measurement portability is essential. The x-ray source is more suitable for fixed, in-line inspection measurements.
Lixi custom-designed the microprocessor-controlled MCP x-ray detector controller and scintillator, which function as the x-ray and isotope detector. The company also developed the Profiler application software, which converts the detected emissions to thickness values. The microprocessor can be an AMD K6 from Advanced Micro Devices Inc. (Sunnyvale, CA) or a Pentium processor from Intel Corp. (Santa Clara, CA).
The notebook computer that comes with the system also presents users with a choice depending on the application requirements. One possibility is a Libretto notebook from Toshiba America Information Systems Inc. (Irvine, CA) for use in situations where substantial data storage is needed. Another selection is a Cassiopeia palmtop computer provided by Casio Inc. (Dover, NJ), which can be belt-mounted for quick readings but only provides minimum data storage for portable inspections.
The inspection can be performed by two technicians: one manipulates the Profiler while the other monitors the laptop-computer display. However, for some test situations, a single technician can handle both the Profiler and the palmtop computer. Test locations that show a material loss greater than a designated value are then marked for further evaluation by another nondestructive-test method.
Using the Profiler as a scanning tool, the technicians can quickly evaluate all logical problem spots. These include turbulent sections such as elbows and tees; points of flow restriction; regions around chemical-injection points; areas adjacent to superheated nozzles in steam piping; or other points of concern identified through either external visual inspection or system service history.
A Profiler has been evaluated in the field by Engen Petroleum Ltd. (Durban, South Africa), a major oil refinery with "many kilometers of insulated piping that needs inspection for underinsulation corrosion," says Jimmy Groves, a pressurized-equipment inspector at Engen. An 8-in.-diameter pipe with a wall thickness of 0.3 in. was used to confirm the system`s ability to measure total wall thickness. Calibration data were acquired at thicknesses of 0.3, 0.4, and 0.6 in. At least three values are needed to convert the standard logarithmic-output response to a linear response for subsequent values. Three sets of data were taken for each thickness value to provide higher repeatable accuracy.
The Profiler was inserted into one end of a pipe to look at one wall and then at a pipe location that contains a 0.034-in. groove (see Fig. 2). Next, a 0.022-in. shim was added to the 0.3-in. wall thickness. The Profiler was subsequently removed from the pipe and positioned around the pipe with the shim in place; measurement data were taken. The Profiler was then dropped below the shim to the two walls for more data and then placed at the location that had the 0.034-in. groove for additional data.
All the data were stored and then downloaded to the computer for image analysis. Specific data for any point on the graph were obtained by pointing the screen cursor to that part of the graph. The data-acquisition time for this experiment was one second per data point. The time was variable and was determined by the accuracy and the isotope activity level.
Based on field-testing results, Groves says the Lixi scanner has been proven as a fast-acting measurement and monitoring tool for detecting wall-thickness loss on process piping. He has now been using the Profiler for nearly six months.
In one test, a furnace tube section was scanned with and without an internal "coke" deposit. The Profiler clearly detected the coke deposit by a change in wall-thickness readings.
Groves says that the unit`s U-shaped structural positioning arm can be manipulated around pipe fittings, such as bleeders, elbows, supports, and thermowells. "To get a good scan, the center of the radiation source has to be directed at a center point of the pipe," he adds. And to get higher accuracy, two scans need to be done at 90° apart.
Groves verifies that the Profiler can do global inspections on hundreds of meters of insulated or uninsulated piping. Any areas of concern warrant a crosscheck with a visual inspection and other nondestructive methods.
FIGURE 1. To achieve portability, the Profiler inspection system uses a gadolinium-153 isotope mounted on one end of a U-shaped pedestal arm as an ionizing radiation source rather than using an electrically generated x-ray.
Mounted on the other end of the pedestal arm, the x-ray converter includes a scintillator, which is used with a microchannel-plate x-ray detector to produce electrons that are amplified by a factor of 1 million.The discriminator and level detector function as a gray-scale detector, selecting signal pulses based on amplitude to match the region of interest for the pipe material being inspected. The notebook computer calibrates and converts the pulses into data for image presentations on the computer screen as wall-thickness measurements.
FIGURE 2. Computer monitor shows the signal pulse readout of pipe-wall thicknesses in an oil refinery, as measured by the Profiler inspection system.
Through proper calibration of the detected radiation, the Profiler provides, as an output, a double-wall thickness measurement of the pipe, which is used to locate changes along the pipe length to indicate the existence of a blockage or corrosion.
Company Information
Advanced Micro Devices Inc.
Sunnyvale, CA 94088
(800) 538-8450
Web: www.amd.com
Casio Inc.
Dover, NJ 07801
(973) 361-5400
Web: www.casio.com
Engen Petroleum Ltd.
Wentworth, Durban, 4000 South Africa
031 460 3911
Fax: 031 460 3000
Intel Corp.
Santa Clara, CA 95052
(800) 548-4725
Web: www.intel.com
Lixi Inc.
Downers Grove, IL 60515
(630) 620-4646
Fax: (630) 620-7776
Web: www.lixi.com
MDS Nordion
Kanata, Ontario, Canada K2K 1X8
(613) 592-2790
Fax: (613) 592-6937
Web: www.nordion.com
Oxford Instruments plc
Scotts Valley, CA 95066
(831) 438-5742
Fax: (831) 438-5629
Web: www.oxfordinstruments.com
Toshiba America Information Systems Inc.
Irvine, CA 92618
(949) 583-3000
Fax: (949) 583-3140
Web: www.toshiba.com


