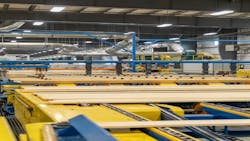
Durgin and Crowell Lumber Company creates interior paneling and exterior siding from eastern white pine. Inspecting the products before they leave the facility is important because consumers don’t want unsightly streaks or indentations on the walls, ceilings, or floors of their homes.
The mill sources white pine logs from within 100 miles of its headquarters. The logs are cut into boards and kiln-dried for more than a week. They are then processed in the planer mill. The process in the planer mill includes a moulder, which is a piece of machinery that shapes the boards into a specific thickness and pattern, such as shiplap or tongue-and-groove.
“Out of the sawmill the board is sort of rough. It has got that rough texture. When we put it through the planer, we can give it that smooth bookshelf finish. It is a series of high-speed knife heads that make that smooth finish or that pattern finish. That is what we do, and that is our primary product,” explains Alex Darrah, Sales Manager at Durgin and Crowell Lumber Company (New London, NH; www.durginandcrowell.com).
Manually Grading and Inspecting Boards
Throughout its history, the mill employed humans to grade and inspect the boards.
The grading system is based on standards for eastern white pine developed by the Northeastern Lumber Manufacturers Association (NELMA), which involves the type and size of knot in a wood board. The inspection process involves looking for surface imperfections that occur during the manufacturing process.
The graders knew whether cutting a piece off the board to remove a knot would keep it in a higher-quality category or if the board needed to be downgraded. They also caught surface imperfections such as roll marks, grooves, or dimples, which they knew would look unsightly once stain is applied to the board.
They made decisions quickly, as 50 boards a minute went by them.
“We used to have these little pop-up stations and every third board would come to them. They could flip it over and they would say, ‘I want to cut 16 inches off this end.’ They could hit some buttons and the saw down the line would do it to that board,” Darrah explains. “It is not just looking and sorting. It is a lot of thought and a lot of calculations.”
Three events led to change. First, “in 2018, our planer mill burnt to the ground, and we had to build from scratch,” Darrah says. Second, numerous companies began selling automated grading systems. Third, the mill’s three inspectors were close to retirement age. Given the tight labor market, “we saw the writing on the wall. That was going to be a tough position to maintain, and there is a lot of training involved,” Darrah says. “It can take months or years to become an efficient grader.”
Adopting Automated Grading of Wood Boards
As a result, the lumber mill’s management team decided to automate the grading and inspection process.
For the first step, the mill purchased and installed an automated grader in 2019. From COMACT, a brand owned by BID Group (Mirabel, Québec, Canada; https://bidgroup.ca/en/), the grader uses a combination of cameras and lasers to analyze the knots in the boards and determine the grade. “The grader can tell if it is a red knot or black knot. Black knots are the ones that can potentially fall out and become a hole in the board,” Darrah explains.
To do this, the grader calculates the size of the knot and analyzes other characteristics to determine if it is likely to fall out at some point during the manufacturing or packaging process. The grader then determines whether to cut off a piece of the board or downgrade the board’s category.
“Now, I have one person standing there where I used to have three. They are not grading, but they are doing some visual inspection,” Darrah says.
Adding An Inspection Process
While the automated grader efficiently categorizes boards into grades, it does not catch manufacturing imperfections, which happen “all day long,” Darrah explains, because “eastern white pine is soft.” For example, an errant piece of wood could get stuck in the machinery, knives might become dull, or rollers might not be aligned correctly.
“If you don’t catch it, you’ve got a pile of lumber that is not good. You want to know sooner rather than later,” he explains.
That is why the mill’s managers decided to explore options to add an inspection system that would catch manufacturing defects immediately after the boards go through the moulders.
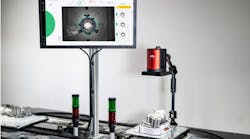
Based on a referral, Darrah approached Bodkin Design & Engineering (Newton Upper Falls, MA, USA; www.bodkindesign.com). The machine vision engineering firm designed a machine vision solution that helps the mill’s quality control staff detect imperfections on the surface of the boards caused by the manufacturing process.
Called the Surface Finish Inspector, the solution allows the mill’s quality control staff to view the boards on computer monitors located in the control room, on the plant floor, Darrah’s office, and elsewhere. The Surface Finish Inspector stores images until the last hour of operation each day, so mill personnel can go back and review defects.
The Surface Finish Inspector, which was installed at the plant in 2022, is housed in an enclosure with dimensions of 2 x 1.5 x 6 ft. By enclosing the system, Bodkin’s engineers ensure that uncontrolled ambient light does not interfere with the imaging process. Images are taken as the boards move through the enclosure via a conveyor system.
The components of the system include the following:
- Phoenix GigE POE monochrome camera from LUCID Vision Labs. (Richmond, BC, Canada; https://thinklucid.com/)
- Fixed focal length, C-mount lens from VST America (Arlington Heights, IL, USA; https://vst.co.jp/en/)
- IMX 267 CMOS sensor from Sony. (Tokyo, Japan; www.sony.com/en/)
- LED structured illuminator
- Fold mirror
- Enclosure
There are two enclosed machine vision systems: one for each of two lines where boards move along conveyors. The machine vision systems are installed immediately after the boards go through the moulder, allowing staff members the maximum amount of time to review the images in real time and then decide if they need to stop the production line to fix a problem. The moulders are installed earlier in the production process than the automated grading machine.
To enable employees to view the boards in sufficient detail a structured lighting system was employed. The machine vision system not only accentuates the defects but freeze frames the boards that are moving at 842 ft/min. The Bodkin team designed a system with a frame rate of 12.5 fps with an object distance of 750 mm and a focal length of 16 mm. The image field size is 16 in to accommodate the wood boards, which are 12 in wide.
Darrah adds, “It almost makes the board look like the surface of the moon and those little divots or defects stick right out.”
The camera system takes images, which are concatenated, or linked, together without gaps, so operators can view them continuously. Images from both systems are processed on a single PC.
Challenges During Implementation
The engineers solved numerous implementation challenges in the design and implementation of the system.
The primary challenge they faced was building a system that would fit into the space available, given the mill’s existing conveyors and machinery.
To help solve this problem, the Bodkin team positioned a mirror inside each enclosure. “Folding the illumination path allowed us to reduce the size of the light shield (box). Without the folds, the light shield would have to extend way out, making the system awkwardly large,” Andrew Bodkin, Principal of Bodkin Design & Engineering, says.
The Bodkin team also addressed the system size issue through the lens selection process.
“We tested a number of lenses to find one that was telecentric enough to match with the Sony Pregius chip we had purchased. (Purchase options were limited due to chip shortages). Initial testing was done with a Nikon lens intended for 35 mm film. But its focal length was too long to package conveniently, and shorter focal length lenses were either too slow to eliminate motion blur, or too vignetting (less brightness near the image’s edges) to allow for reasonable performance when the images were concatenated,” Bodkin explains.
After testing, the team settled on the product from VST America.
The Bodkin team wrote machine vision algorithms using C++.
Another challenge was the risk of interference from the mill’s production machinery on the imaging process, particularly given the distance from the inspection system to the control room’s PC, where images are processed and monitored. Bodkin tested a 100-foot Ethernet cable, and “it worked just fine,” he says.
However, the mill’s team of electricians used 250 ft of cabling to install the production system. “It was very slow,” Bodkin says. “We were lucky if we took six pictures a second.”
With coaching from Bodkin, the electricians shortened the length to 125 ft and the performance of the machine vision system improved dramatically.
The firm has access to the Surface Finish Inspector remotely, allowing it to tweak the system as necessary, such as changing a camera’s settings, or work with the mill’s staff on modifications.
Results
The system has produced positive results for the mill. “Everybody here is in agreement that it has helped us catch things,” Darrah says. It is almost a few times an hour. It is instantaneously helping us catch things we weren’t catching.”
Darrah also notes that the costs associated with defective products add up quickly, particularly if a truckload of paneling is delivered to a customer and then returned to the mill. “The benefit value of finding those problems early is tremendous,” he says.


