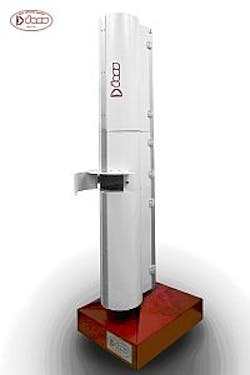
Doss metrology systems employ telecentric lenses
New automatedmetrology systems measure O-rings, irregular shapes, and washers with the push of a button. The ET4 measuring unit uses a 2000 × 2000-pixel camera with telecentric lens to acquire images without distortion on the glass table. The ET6 is composed of a 2-D measuring unit and 3-D thickness measuring unit, employing a 2000 × 2500-pixel camera with telecentric lens and motorized plate. Several parts can be measured simultaneously. Collected data are transferred to a computer accessible via GUI and are saved in a database. The systems can be networked for access as well.
Doss Visual Solution
Erbusco, Italy
-- Posted byVision Systems Design
---
NEW PRODUCT PRESS RELEASE
DOSS VISUAL SOLUTION S.r.l. PRESENTS ET4 and ET6
Product overview
Doss presents two innovative systems for the quick and reliable measuring of O-rings, irregular shapes and washers.
The operator places the samples in the staging area and presses a single button for the automatic processing of the measurement. The operator no longer needs to adjust the samples on the plate and several parts can be measured at the same time.
The collected data are transferred to a computer and which can be accessed by the operator through the graphic interface. These data are saved in a database and are available for the operator at any time. The system can be accessed by a network as well.
ET-4
The measuring unit consists of a glass table and a tele-centric lens framed in aluminium profiles and painted guards. The overall dimensions are: 420 x 840 x H2000 mm. The operator places the part to measure on the glass table, the camera (matrix 2000x2000) together with the telecentric lens acquires the image without distortion.
Type of check - Ring
Min.and Max ID
Min.and Max OD
Max difference between the max and the min ID
Min. Max. Chord
Average ID
Average OD
Average Chord
Multiple measurement (it allows to measure more parts within the framed field by comparing them with the set average tolerances).
Type of check - Irregular shape
Four adjustable rulers (identified with the auto-learning) for the measurement of linear distances on the part's shape.
Automatic definition of the measurement point (by means of a dedicated software) which allows obtaining orthogonal measurements (even of non parallel profiles).
Partial curving rays, distance between the centers, ID.
Part's data saving for following consecutive measurements without need to orient the part.
Comparison with the tolerances (five positive and five negative (or at zero) with respect to the nominal value)
Saving of the obtained values in a chart with CP and CPK calculation
Product specifications
Technical data sheet
ET4
Framed field: 130x130mm
Max. diameter measurable part: 124 mm
Min. diameter measurable part: 1 mm
Part's thickness (Z): 0,1 - 30 mm
Elaboration time: 1 pc/sec.
Measure repeatability ± 0,013 mm
Measure accuracy ± 0,027 mm
Noise level: < 15 dB
Single-phase power supply: 230V - 50Hz
Use temperature: +5°C to +40°C
Relative humidity: max 80%
Electrical safety protection: IP 44
Installed power supply: 0,5 kw
Average consumption: 200 w
ET6
The device is composed of a 2D measuring unit and of a 3D thickness measuring unit. The units are framed in aluminium profiles and painted guards and the overall dimensions are: 420x990x2000(h) mm. The operator manually places the sample to measure on the motorized plate. While the sample is being moved towards the camera, the device will take a series of real thickness measurements on the sample along a virtual line. The camera (matrix 2000x2500px) together with the telecentric lens acquires the image without distortion on the 2D plane.
Type of check - Ring
Min.and Max ID
Min.and Max OD
Max difference between the max and the min ID
Min. Max. Chord
Average ID
Average OD
Average Chord
Multiple measurement (it allows to measure more parts within the framed field by comparing them with the set average tolerances)
Thickness values obtained along the virtual line.
Type of check - Irregular shape/washers
Four adjustable rulers (identified with the auto-learning) for the measurement of linear distances on the part's shape.
Automatic definition of the measurement point (by means of a dedicated software) which allows obtaining orthogonal measurements (even of non parallel profiles).
Partial curving rays, distance between the centers, ID.
Part's data saving for following consecutive measurements without need to orient the part.
Comparison with the tolerances (five positive and five negative (or at zero) with respect to the nominal value).
Saving of the obtained values in a chart with CP and CPK calculation.
Thickness values obtained along the virtual line.
Product specifications
Technical data sheet
ET6
Framed field: 130x130mm
Max. diameter measurable part: 124 mm
Min. diameter measurable part: 1 mm
Part's thickness: 0,1 - 9 mm
Thickness measure pitch 0,0,1 mm
Resolution thickness measure ± 0,005 mm
Elaboration time 2D: 1 pz/sec.
Elaboration time Thickness: 24 sec
2D Measure repeatability ± 0,013 mm
2D Measure accuracy ± 0,027 mm
Noise level: < 15 dB
Single-phase power supply: 230V - 50Hz
Use temperature: +5°C to +40°C
Relative humidity: max 80%
Electrical safety protection: IP 44
Installed power supply: 0,5 kw
Average consumption: 200 w
SOURCE:Doss Visual Solution
