Vision sensors inspects wheel fasteners
Maclean Vehicle Systems (MVS; Royal Oak, MI, USA), a manufacturer of wheel fasteners, now uses machine vision sensors to inspect difficult-to-image threads of automotive wheel fasteners. Previously, the company performed fastener inspection with an eddy current sensor, which had difficulty in detecting small differences in distance between a threaded and unthreaded part. Increasing the sensitivity resulted in rejection of a significant number of good parts. T. J. Konieczke, manufacturing controls engineer for MVS, said, “We selected machine vision after considering other methods such as retroflective or photodiode sensors, but concluded that both would have difficulty clearly distinguishing between good and bad parts.
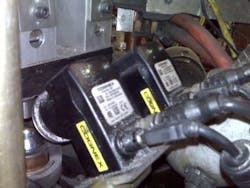
Instead, Konieczke mounted two Cognex (Natick, MA, USA) Checker 101 vision sensors looking down at a 45-degree angle about five inches from two parts inspected simultaneously on the assembly machine. The parts are presented to the inspection station in a fixture and held in position by a spring-loaded keeper, so there is some variability in the height at which they are positioned.
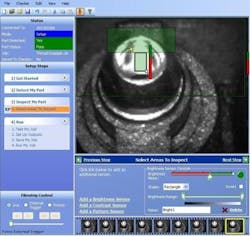
Konieczke set up the vision sensor by dragging inspection tools and dropping them onto the features that he wanted to inspect. First, he addressed the variable placement of the part by using an edge finder tool to locate the edge of the part. Then he picked a brightness tool to look for the light reflecting off the threads.
MVS has since upgraded the application to the Cognex Checker 3G vision sensor primarily because it can be used with the Cognex SensorView Teach Pendant Display Panel, which enables operators to monitor the vision application. The vision sensor virtually eliminated the rejection of good parts and has not passed a single bad part in production or in frequent challenge tests under normal operating conditions.
Source: Cognex
Posted by Conard Holton
Vision Systems Design


