Snapshots
Vision ensures better writing implements
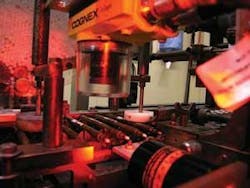
BIC NZ, a subsidiary of the BIC Group (Paris, France; www.bicworld.com), produces pens in New Zealand but also exports to Mexico, Chile, Australia, Canada, and the USA. Its felt-tip-pen assembly machine, customized in-house by BIC NZ, produces about 15 million pens per year. The machine has an excellent yield, but occasionally pen tips split during insertion, or parts are fed incorrectly. BIC was relying on manual control by operators to monitor quality, but at high production speeds guaranteeing consistent product quality had been difficult.
BIC commissioned ControlVision (Auckland, NZ; www.controlvision.co.nz) to provide an automated inspection solution that uses two Cognex (Natick, MA, USA; www.cognex.com) In-Sight 5100 vision sensors-one for tip inspection and one for end-plug inspection. Special-purpose LED-based lighting was chosen for each imaging task.
The vision sensors interface via digital I/O to an Omron (Auckland, NZ; www.omron-ap.co.nz) PLC, which controls the machine and rejects any failed parts. A touch-screen panel PC, running MicrosoftWindows XP and Cognex In-Sight Explorer software, acts as both the operator and programmer interface. Inspection results can be viewed via a Web browser or loaded into Excel for offline analysis.
Bernie Jamieson, manufacturing manager at BIC NZ, says, “As a small plant we suffer from economies of scale compared to the larger plants offshore. We’ve looked at this technology before, but this time the price-performance is at a level where we can justify the investment.”
Acoustic camera creates images
A camera system that produces images using sound rather than light could create far more detailed pictures than conventional ultrasound equipment. The acoustic device, developed by a team led by Chris Stevens at Oxford University (Oxford, UK; www.ox.ac.uk), could be used in enhanced medical ultrasound or in airport security scanning to provide images of hidden hard-plastic and ceramic objects. The device can also produce clear pictures underwater and through smoke and fog.
The system works like a digital camera, in which data from an array of light-sensitive detectors are correlated on a CCD chip to build an image. In this case, the data come from a large array of microphones. Existing sound imaging devices using microphone arrays require a separate A/D converter for each microphone, as well as complex electronic systems. The Oxford researchers have developed a small-scale system that can carry out this task quickly, despite collecting data from a large microphone array. The system also collects information on both the phase and amplitude of the sound waves, which allows 3-D images to be produced. Terry Pollard, project manager for the device at ISIS Innovation (Oxford, UK; www.isis-innovation.com), Oxford University’s technology-transfer arm, says the researchers are building a demonstration model of the system featuring 225 microphones, along with the associated electronics and computer-processing systems.
3-D x-ray system scans components
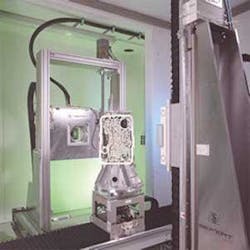
German engineers have developed an industrial x-ray system that checks the dimensions of machined components by building highly accurate 3-D images. The system, designed at the Fraunhofer Development Center for X-ray Technology (Fürth, Germany; www.iis.fraunhofer.de), uses a computed-tomography scanner developed by ProCon X-Ray (Garbsen, Germany; www.procon-x-ray.de).
To check components, manufacturers traditionally use either destructive methods or optical- or surface-scanning techniques, which take several hours and do not inspect complex contours well. The new system scans an object by registering the transition from solid body to air, determines the contours of the component, and derives measurements of the object to within 10 μm. Software converts these measurements into a 3-D cloud of measuring points, and an algorithm identifies geometrical forms. The 3-D image can be compared to the original CAD model of the object to check that the finished component matches the original design.
Joachim Gudat, managing director of ProCon X-Ray, says that one advantage is that a new detector system enables the equipment to scan far larger objects than previously possible, making it competitive with more expensive industrial x-ray machines.
Tiny endoscopes peer within
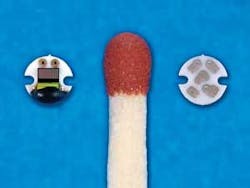
As part of the European Information Society Technology’s project Intracorporeal VideoProbe (IVP), researchers at IMS Chips (Stuttgart, Germany; www.ims-chips.de) have developed two prototypes of tiny endoscopes. The first is a wired endoscope called IVP1; the second is a wireless probe called IVP2 that can be taken in the form of a pill. Both prototypes are equipped with optics for illumination, as well as mechanical components for swiveling the image sensor. The head of IVP1 is 3.5 mm in diameter, and the image sensor itself is a CMOS chip measuring 2.7 × 2.3 mm.
‘The great advantage of our prototype is that the image sensor is incorporated into the head of the endoscope, which provides much better images for the surgeon,” says Christine Harendt from IMS Chips. Existing endoscope heads with the image sensor integrated into the head are usually twice the size. Endoscopes with the image sensor set back from the head of the probe tend to lose image resolution because of the additional fiberoptic link to the head.
While the travel of IVP2 cannot be controlled like IVP1, a motor in the head enables the image sensor to swivel to provide views in different directions. The IVP2 pill draws power by induction from a vest worn by the patient, which also picks up the images transmitted from the probe. Both prototypes are being readied for medical evaluation.


