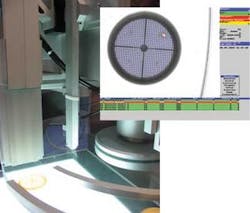
Smart camera inspects gasoline filters
Andrew Wilson, Editor, [email protected]
Theo Hillers GmbH (Kall, Germany; www.hillers.de) is a manufacturer of molded thermoplastic filters for the automotive, pharmaceutical, and electronics industries. After manufacturing, each filter must be checked to ensure that the filter mesh is made up of a uniform array of holes of consistent size. Inspecting these 1-in.-diameter parts manually at rates of approximately one filter per second is a difficult task.
Consequently, Theo Hillers contracted IBN Ingenieurbüro (Mülheim, Germany; www.ibn-gmbh.de) to build a vision-based system capable of performing this task automatically. Working in conjunction with Heinen Sondermaschinenbau (Neustadt, Germany), IBN developed the system using a combination of off-the-shelf lighting, smart cameras, PLCs, and motor controllers.
Says Bernd Neumann, managing director of IBN, “An operator loads the filters onto a 2-in.-wide transparent conveyor. As the filters move along the conveyor, the leading edge of the filter is detected by a photo switch from Panasonic Industrial Europe (Hamburg, Germany; www.panasonic-industrial.com). Because each part must be inspected individually,” says Neumann, “the system must ensure that single filters are presented to the inspection station one at a time. Filters that are abutted to each other as they travel along the conveyor belt cannot be inspected since the system is designed to automatically inspect single filters one at a time.”
To ensure this occurs, the leading edge trigger signal is sent to a Siemens PLC from the photo switch. Simultaneously, the pulses from the conveyor belt’s motor encoder begin to be counted. As individual filters move through the light sensor, the falling edge of the filter is again detected and the number of pulses generated by the motor encoder is counted.
“Since the speed of the conveyor and the diameter of each filter are known,” says Neumann, “the system can determine whether individual or abutted parts are traveling along the conveyor.” Should the PLC count too many pulses, the filters are rejected and properly replaced on the conveyor. When the PLC detects the correct number of pulses, it triggers the digital I/O line of a Pictomat PM408E camera from Vision Components (Ettlingen, Germany; www.vision-components.com). With 640 × 480-pixel resolution, the full-frame progressive-scan camera features a 63 frames/s frame rate and an on-board 3200-MIPS, 400-MHz TMS320C64xx DSP from Texas Instruments (TI; Dallas, TX, USA; www.ti.com).
To perform image inspection on captured images, Neumann and his colleagues used Vision Components VC Lib image-processing library in conjunction with TI’s Code Composer Studio C cross compiler. As parts pass under the field of view of this camera, they are illuminated from below with a 6-in.-square diffuse white light panel. Light shining through the transparent conveyor then produces a backlit silhouette image of the part to be inspected. “To determine the integrity of each filter,” Neumann says, “it was necessary to analyze each of the holes in the filter component.”
To accomplish this, a histogram is first performed on each image and a specific threshold set to segment the image. After segmentation, the image is binarized, resulting in an image that can be further analyzed using blob inspection. “Because the sizes of the holes in the filter are known,” says Neumann, “any blob analysis that results in a measurement larger than a predefined size will mean that the filter is defective.”
Thus, the system needs only look for the largest blob size within the image to determine whether a specific part is defective. Should this occur, digital I/O lines from the camera are used to trigger the PLC, which then again instructs the reject mechanism to fail the part. “In this way,” says Neumann, “the system can both reject abutting parts that cannot be automatically inspected as well as visually inspect the parts to ensure product quality is maintained.”

