Saccade Vision and Euclid Labs Create Optical Inspection Tool
Rehovot, Israel and Nervesa della Battaglia, Italy—Saccade Vision, creator of vision inspection tools, and Euclid Labs, developer of software for small-batch manufacturing, have produced an inline 3D inspection solution for metalworking machines.
The jointly developed product is designed to automate quality control in machine jobs, which is often “done through manual inspection because of the cost and effort required for the implementation of a fully automated optical inspection solution,” the companies said in a news release.
Alex Shulman, co-founder and CEO of Saccade Vision, a startup founded in 2019, adds that “existing machine vision solutions often require long application-specific development, complex integration, and significant efforts to get reliable results. Those indirect costs are typically 4-5x compared to direct costs of components.”
Shulman also notes that many “manufacturers use offline metrology coordinate measuring machines (CMMs) for quality control. While CMMs are very precise, they are slow, expensive, and typically inspect a limited number of points on parts. Some applications, such as sheet bending, are extremely difficult to inspect using mechanical gauges and CMM.”
In the news release, Roberto Polesel, CEO of Euclid Labs, adds, “When adopting ‘software-defined manufacturing,’ we need to get rid of inspection based on a collection of single measurements performed with multiple tools. We have seen applications with three smart cameras and 10 distance sensors to verify a mechanical assembly."
How the Tool Works
To solve these problems, the new tool combines Saccade’s multidirectional 3D camera and software with Euclid Labs' point cloud visualization and analysis technology. As Chiara Camporese, sales and marketing manager at Euclid Labs, explains, “We saw that the Saccade sensor is a different product, not simply better or faster than the existing ones. It gives us the flexibility that our software can leverage to simplify the design and implementation of complex inspection systems.”
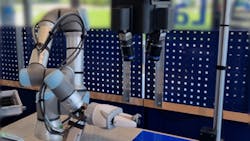
The product allows manufacturers to automatically inspect 100% of machined parts right after production. The tool incorporates the same robot used to load and unload parts into and out of the metalworking machine. Manufacturers can create “locally optimized 3D imaging, so that the sensor can optimize data acquisition on regions of interest to reach sub-pixel 3D resolution while at the same time ignoring non-important regions and dramatically reducing the required computational power,” Shulman says.
“The combination of Euclid Labs advanced digital twin and the ability to set up an inspection process directly from the CAD model (and automatically optimize regions of interest) allows fast inspection setup by factory technicians. This has a significant value, especially for high-mix manufacturing, where setup represents a significant burden,” he adds.
The initial focus of the new product is checking flanges and angles of metal sheet parts after a bending process as well as assembly processes for multiple items. The companies say they have sold the inspection system to an undisclosed multinational conglomerate involved in industrial engineering and steel production. They expect to deliver the product to their customer in 2022.
About the Author
Linda Wilson
Editor in Chief
Linda Wilson joined the team at Vision Systems Design in 2022. She has more than 25 years of experience in B2B publishing and has written for numerous publications, including Modern Healthcare, InformationWeek, Computerworld, Health Data Management, and many others. Before joining VSD, she was the senior editor at Medical Laboratory Observer, a sister publication to VSD.

