MEASUREMENT/GAUGING: Phase measurement technique detects defects in specular surfaces
The human eye is certainly capable of identifying even the smallest topographical changes on the surfaces of objects; however, the nature of their surfaces often requires a particular automated imaging system for detailed analysis. A number of different methods have been used to measure the surface of diffusely reflecting objects, including structured-light projection, fringe pattern projection, and stereo vision techniques.
However, when the surfaces of objects such as automotive body panels and optical components are specularly reflective, such techniques will not prove as effective. While alternative techniques such as white light interferometry can be used to assess surface defects, they are often limited by their small field of view.
Now, Stefan Werling and his colleagues at the Fraunhofer Institute of Optronics (www.iosb.fraunhofer.de) have developed a technique known as phase measurement deflectometry (PMD) to overcome these limitations.
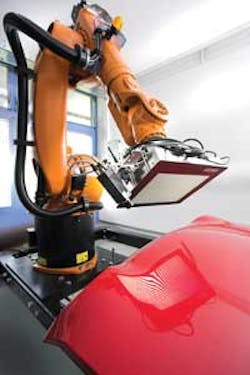
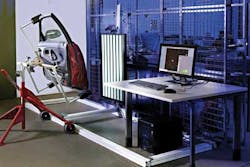
Specular objects reflect light in a single direction, so incoming light must be provided from many directions to ensure that some light is reflected into the camera system. Because of this, the system uses a 42-in. diagonal LCD diffuse display as a pattern generator to illuminate the object to be measured (see Fig. 1).
To determine the local slope of the surface, a series of four fringe patterns with sinusoidal profiles are displayed on the LCD and the reflected image captured by a CCD or CMOS camera. Four patterns, each shifted by π/4, are displayed sequentially by the LCD to result in four different images, each with varying pixel values (or intensities) across each image. From the captured images, the phase or a measurement of the local slope at every point in the object can be calculated for every pixel in the image. By determining the correspondence between displayed and reflected images, the surface normals of the object and, consequently, 3-D coordinate information can be determined.
Four different methods can be used to analyze these data (see Fig. 2). Depicted as a height map, curvature equivalent features of spatial defects can provide data regarding the surface integrity of painted sheet metal (see Fig. 2a). Alternatively, a reconstruction of the complete surface allows the measurement of local topographic defects on large surfaces to be made (see Fig. 2b).
The system also can generate 3-D models of large, complex-shaped objects, allowing texture analysis techniques to be used to determine their topographic structures. Figure 2c, for example, shows the PMD reconstruction of a complete engine hood taken with approximately 50 PMD measurements. These PMD reconstructed images can also be compared with existing CAD models, enabling PMD surface reconstructions of a car part to be compared with its CAD model (see Fig. 2d). In this image, the contour lines reveal variations of only a few microns.
In the system developed at Fraunhofer IOSB, measurements on surfaces as large as 8.3 × 11.7 in. can be made. For inspecting larger objects, the combined LCD projector-camera system can be moved robotically and individual smaller surfaces stitched into larger images.
Vision Systems Articles Archives


