FACTORY AUTOMATION: GigE cameras inspect automotive assemblies
In automobile manufacturing, it is essential to inspect whether parts such as plugs, rivets, and screws are correctly placed on the car chassis and body as the car moves along the production line. Stefan Gehlen, managing director of VMT Bildverarbeitungssysteme (Mannheim, Germany; www.vmt-gmbh.com), and his colleagues have developed a number of machine-vision systems to accomplish these tasks.
The first system, used at an early stage of the car manufacturing process, inspects the numerous plastic plugs that seal more than 80 openings in the underbody. Since these items prevent moisture penetration, not a single one must be missing.
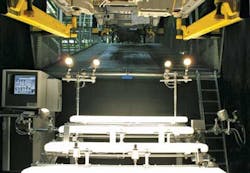
This inspection takes place during the manufacturing process while the vehicles are being moved along the production line at a speed of about 5 m/min. As each vehicle passes a light barrier, an incremental encoder transmitter coupled to the conveyor transmits the vehicle's position to an industrial PC-based inspection system. The data are then used to trigger 10 uEye HE Series GigE cameras from Imaging Development Systems (IDS; Obersulm, Germany; www.ids-imaging.com) that capture multiple images of the underbody so all areas can be successively inspected and analyzed (see figure). These cameras are placed below and to the sides of the chassis in such a manner that every single plug is visible by at least one camera while the vehicle is moving.
Five high-frequency fluorescent lamps triggered at 1000 Hz provide diffuse lighting for an even illumination of the underbody. The cameras must accommodate images from both reflective and nonreflective surfaces as well as those of various colors. The automatic gain control feature of the uEye Series cameras automatically adjusts each camera's sensor gain to keep the average image brightness constant without changing exposure time.
Two more systems along the manufacturing line, each equipped with 12 uEye GigE cameras, verify that all expanding rivets and screws have been fitted in the wheel arches of the nearly complete cars.
On each side of the car, six cameras focus on wheel arches and trim elements from different viewing angles. To ensure the correct illumination, additional halogen lamps are used to illuminate wheel arches. Image data from the cameras are transmitted to an industrial PC via two GigE network cards and switches.
VMT used the 140 functions in IDS's uEye SDK to capture the images. In addition to an ActiveX component and the DirectShow interface, the cameras also support the GenICam machine-vision software standard. Since driver compatibility is ensured between all uEye cameras, no programming is required when switching to a different camera model.
The VMT IS software uses optimized versions of well-known algorithms for image preprocessing and feature extraction. For classification, support vector machines (SVM) are used. These image-processing functions are performed on a separate PC.
If image analysis detects that a part is missing, the system flags the measurement accordingly and issues an error message. Because the manufacturing line has to keep running, though, delaying production and fitting the part is unfeasible. Instead, a special station is provided later in the manufacturing process to allow retrofitting of missing parts without causing a production delay.
Up to 10,000 completed measurements—including the associated images and results—can be stored in the system and can be later viewed for further analysis. This feature is particularly important for the quality control requirements of automobile production.
After thorough teach-in and testing, VMT's inspection systems were integrated into a production environment at a major German automotive manufacturer in March 2009 and additional VMT systems planned for other inspection stations are underway.
Vision Systems Articles Archives

